SAML
SAML
Comet supports SAML to perform federated single sign on to an identity provider of your choice. This document will show you how to set up a basic SAML application using various vendors. Once an SSO IdP has been integrated, a user can log into Comet ML using your organization's directory. Users logging in for the first time will automatically have a new user created using their SSO Directory information. Once logged in the user can perform all actions a normal login provides. As with basic auth, the first user created, whether through an IdP or not, automatically becomes admin.
If your vendor is not listed here please contact us for further support.
Application Configuration
Comet uses a single set of environment variables to configure SAML, regardless of which IdP or vendor you are using.
Before proceeding with the SAML configuration, be sure to enable SSL on your deployment, as it is required for using SAML.
Once finished, we must also set the following variables to enable SAML Authentication.
Please note that despite the presence of aws in the variables and ACS URLs, these variables are fully vendor neutral and will be renamed to something more descriptive soon.
The Service Provider ACS URL must be set to $comet_base_domain/aws-sso/acs/aws_saml/aws_saml.
aws_saml_enabled: true
aws_saml_sp_entity_id: $comet_base_domain
aws_saml_sp_acs_url: $comet_base_domain/aws-sso/acs/aws_saml/aws_saml
aws_saml_idp_entity_id:
aws_saml_idp_sso_url:
aws_saml_idp_cert_file: /opt/comet-ml/certs/saml.pem
aws_saml_debug: true
environment_token: onprem-dn
Let's walk through each shortly.
aws_saml_enabled should be self documenting and actually enables SAML. You can set this value to false and the values below will automatically become ineffective. The aws_saml_debug variable is optional but recommended to set for extra output in case of error.
You'll be asked to set a number of other variables, starting with the IdP identity ID and the SP identity ID.
An Entity ID is a globally unique name for a SAML entity, i.e., your Identity Provider (IdP) or Service Provider (SP). It is how other services identify your entity. Like any other unique identifiers you share to interoperate with others, making sure your identifier is clear, unique, and permenant is critical for successful continued operation of your service.
Entity ID Best Practices
An Entity ID MUST be globally unique.
To ensure your Entity ID is globally unique, it's considered good practice that the Entity IDs be in the form of a universal resource locator (URL).
Please see below for some best practices surrounding meaningful Entity ID creation.
- An entityID SHOULD be an absolute URL starting with “https://” or “http://”; an URL-based entity ID starting with "https://" is more flexible than one starting with "http://"
- The URL SHOULD NOT contain a port number, a query string, or a fragment identifier
- The host part of the URL SHOULD NOT contain the substring “www”
- The URL SHOULD NOT end with a slash (/)
- An entityID SHOULD NOT be more than 30 characters in length
- It is good practice to include the substring
idpin an IdP entity ID - It is good practice to include the substring
spin an SP entity ID - Do not include the substring identifying your SAML provider in an entity ID (
github,okta,jumpcloud) - Do not include the name of your SAML software in an entity ID (
shibboleth,adfs,php)
Remember that an entity ID is a name. It does not need to be a resolvable web location.
SAML entity IDs must be a Universal Resource Identifier (URI), it's important to note that an entity ID is a persistent identifier, not a web location. An entity ID need not resolve to an actual web resource. If you do make your entity ID a resolvable web link, the link should point to a web page describing your service and mention that the location is an identifier for your service.
The domain in the entity ID need not match those in the endpoint locations in metadata. A common misconception is that the entity ID must match the endpoint locations for the deployment.
This is not required. The entity ID should accurately reflect the organization that owns the entity.
Endpoint locations, on the other hand, are resolvable DNS names.
Examples of well formed entity IDs:
IdP names:
- https://yourcompany.com/idp
- https://internal.yourcompany.com/idp
SP names:
- https://comet.example.com/sp
- https://internal.comet.example.org/sp
The aws_saml_sp_acs_url should be set to $comet_base_domain/aws-sso/acs/aws_saml/aws_saml.
Leave the aws_saml_idp_sso_url and saml_idp_cert_file blank for now, as you'll need to configure the Identity Provider side of your SAML application before you can fill these in. If you already have your IDP configuration completed, provide both now.
The default path where Comet looks for the IdP Certificate is at /opt/comet-ml/certs/saml.pem but you may provide any other location on the filesystem you please as long as the application has permissions to read the file. For the environment_token you should use onprem-dn unless expressly told otherwise by Comet support.
Signing your SAML requests
Optional If your SAML workflow requires signed tokens to be sent by the SP , you can set this on the application side by setting the following variable (Default: False)
aws_saml_security_authnrequest_signed: true
Jumpcloud
IdP configuration
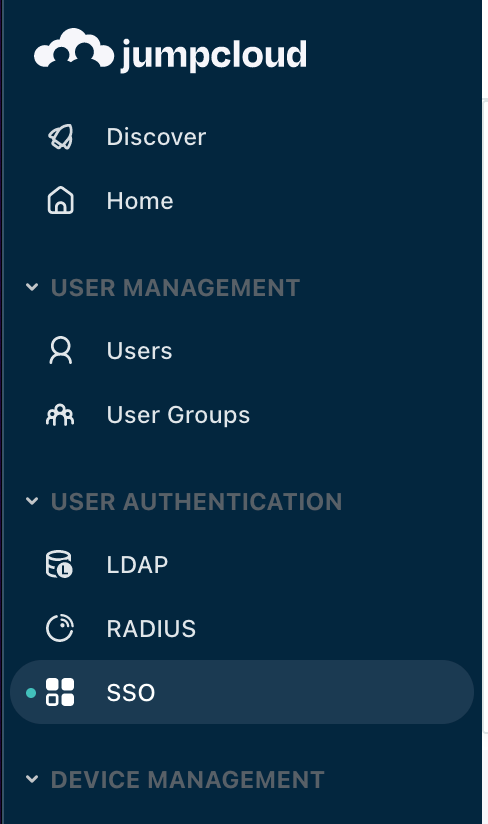
Within your Jumpcloud administrator panel, select SSO under User Authentication...
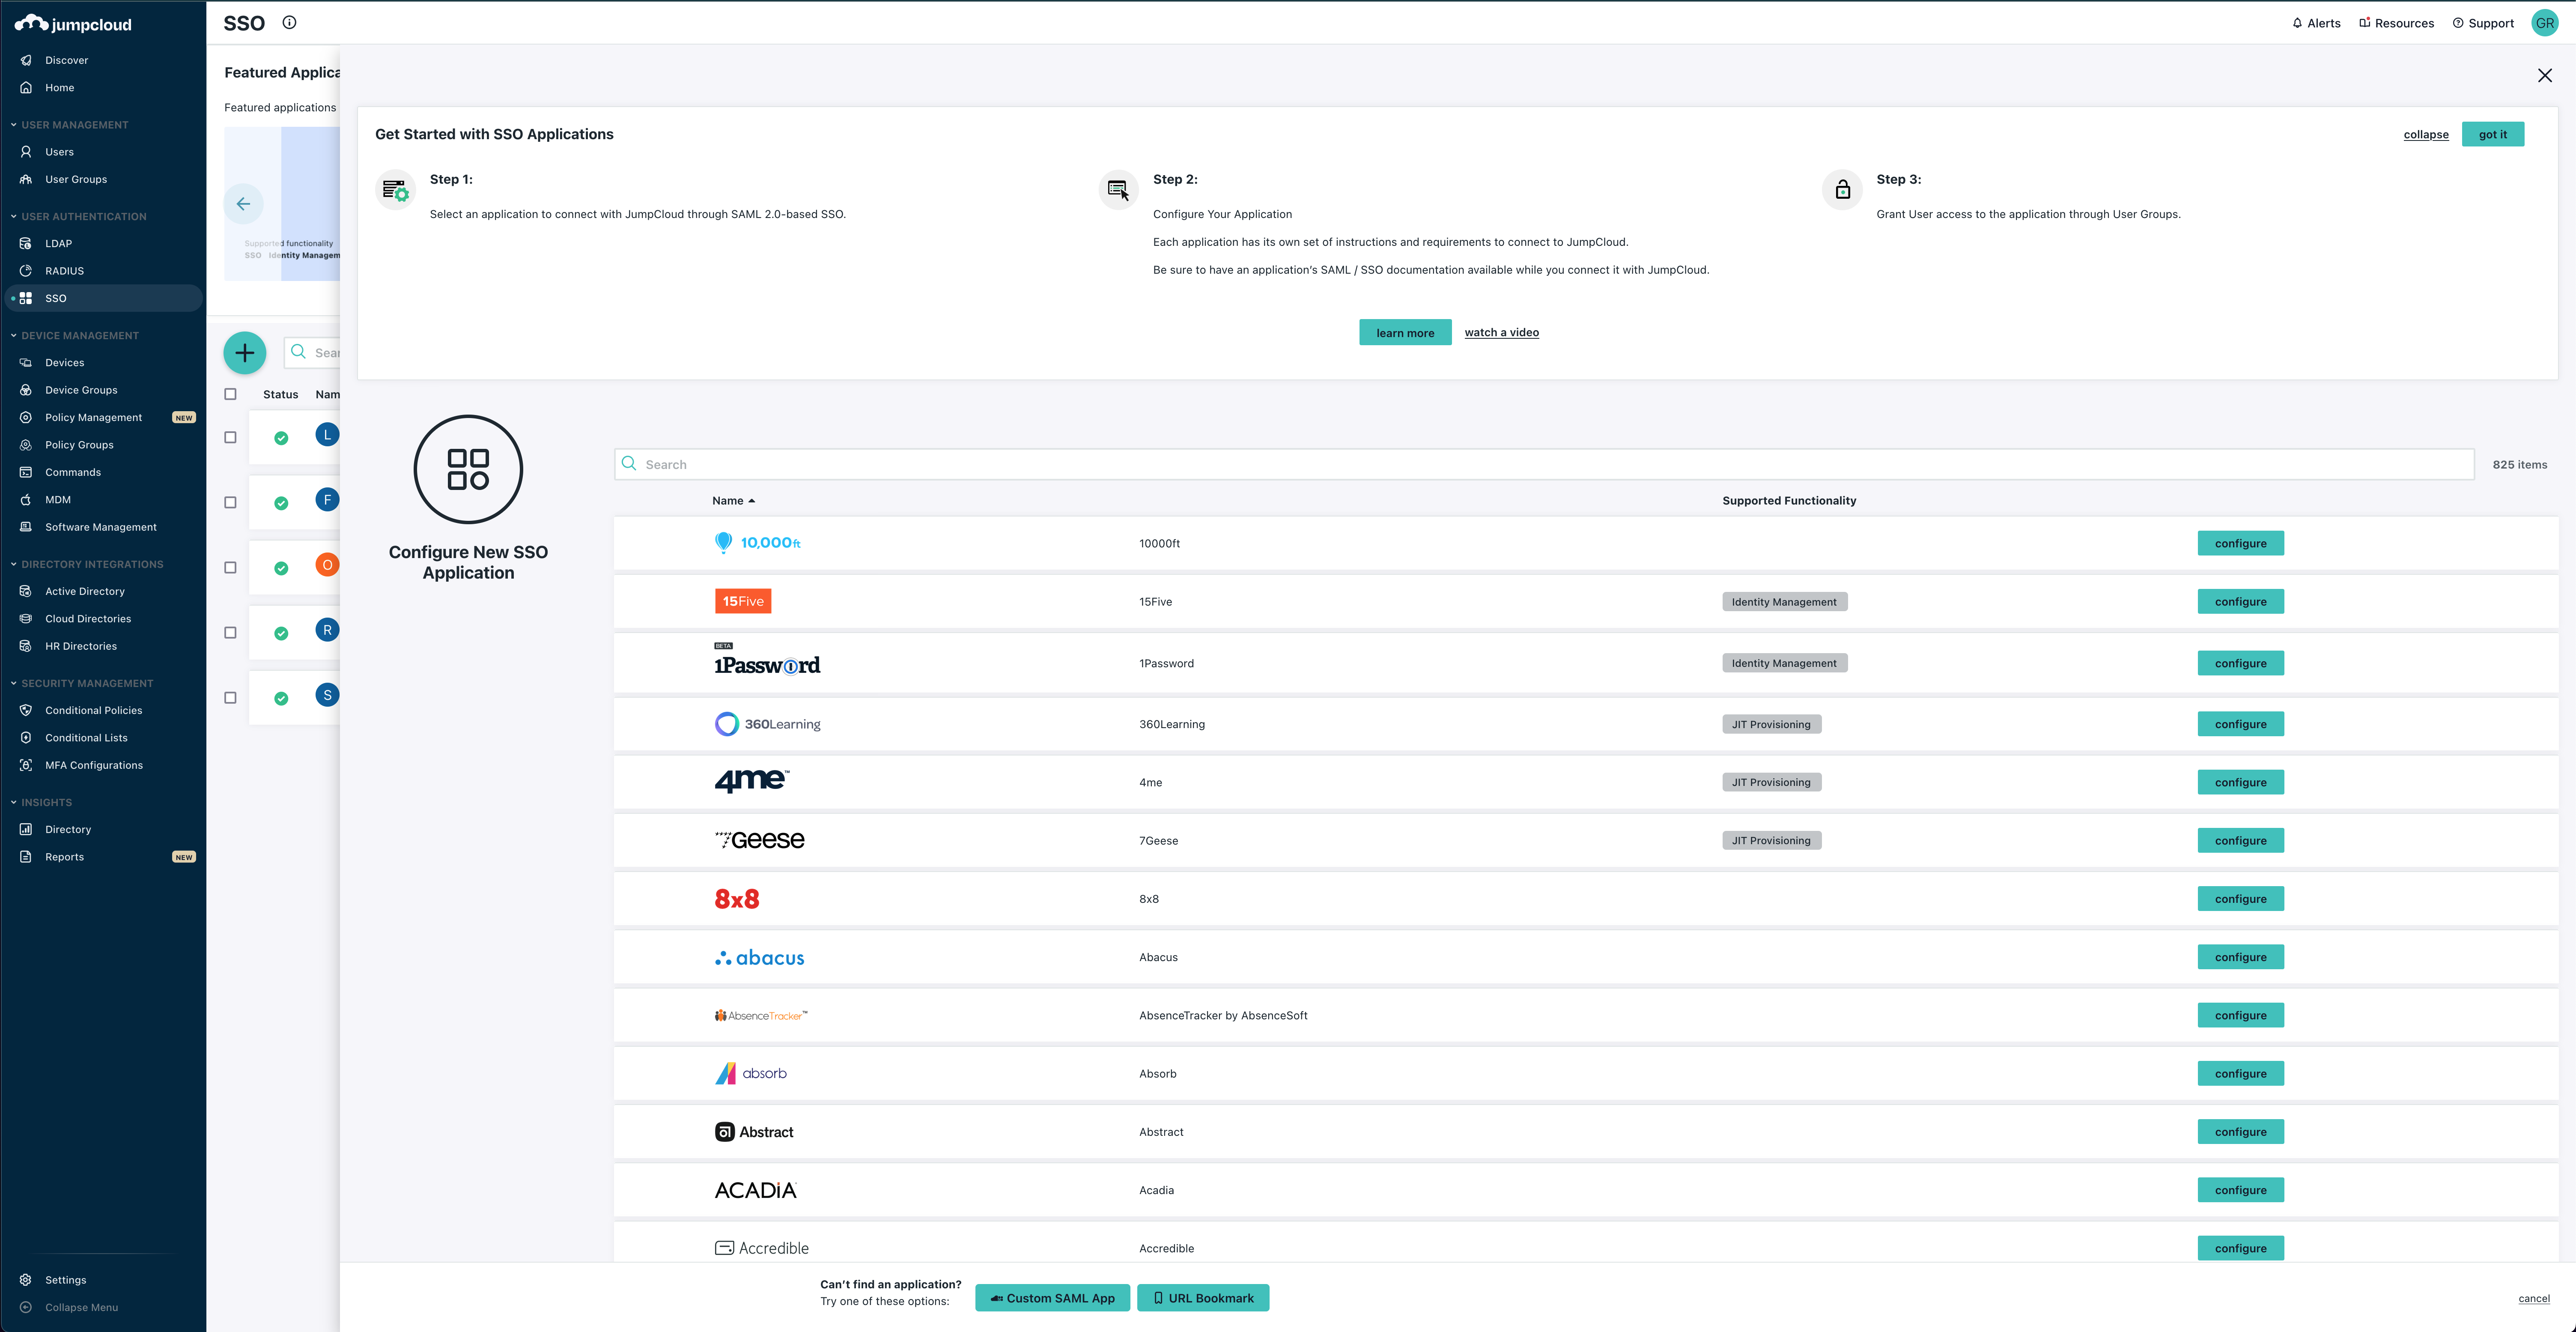
And click the big green + to add a new SAML application.

Since we do not have an out of the box SSO application for Comet, select Custom SAML App at the bottom.
Give your SAML application a descriptive name...
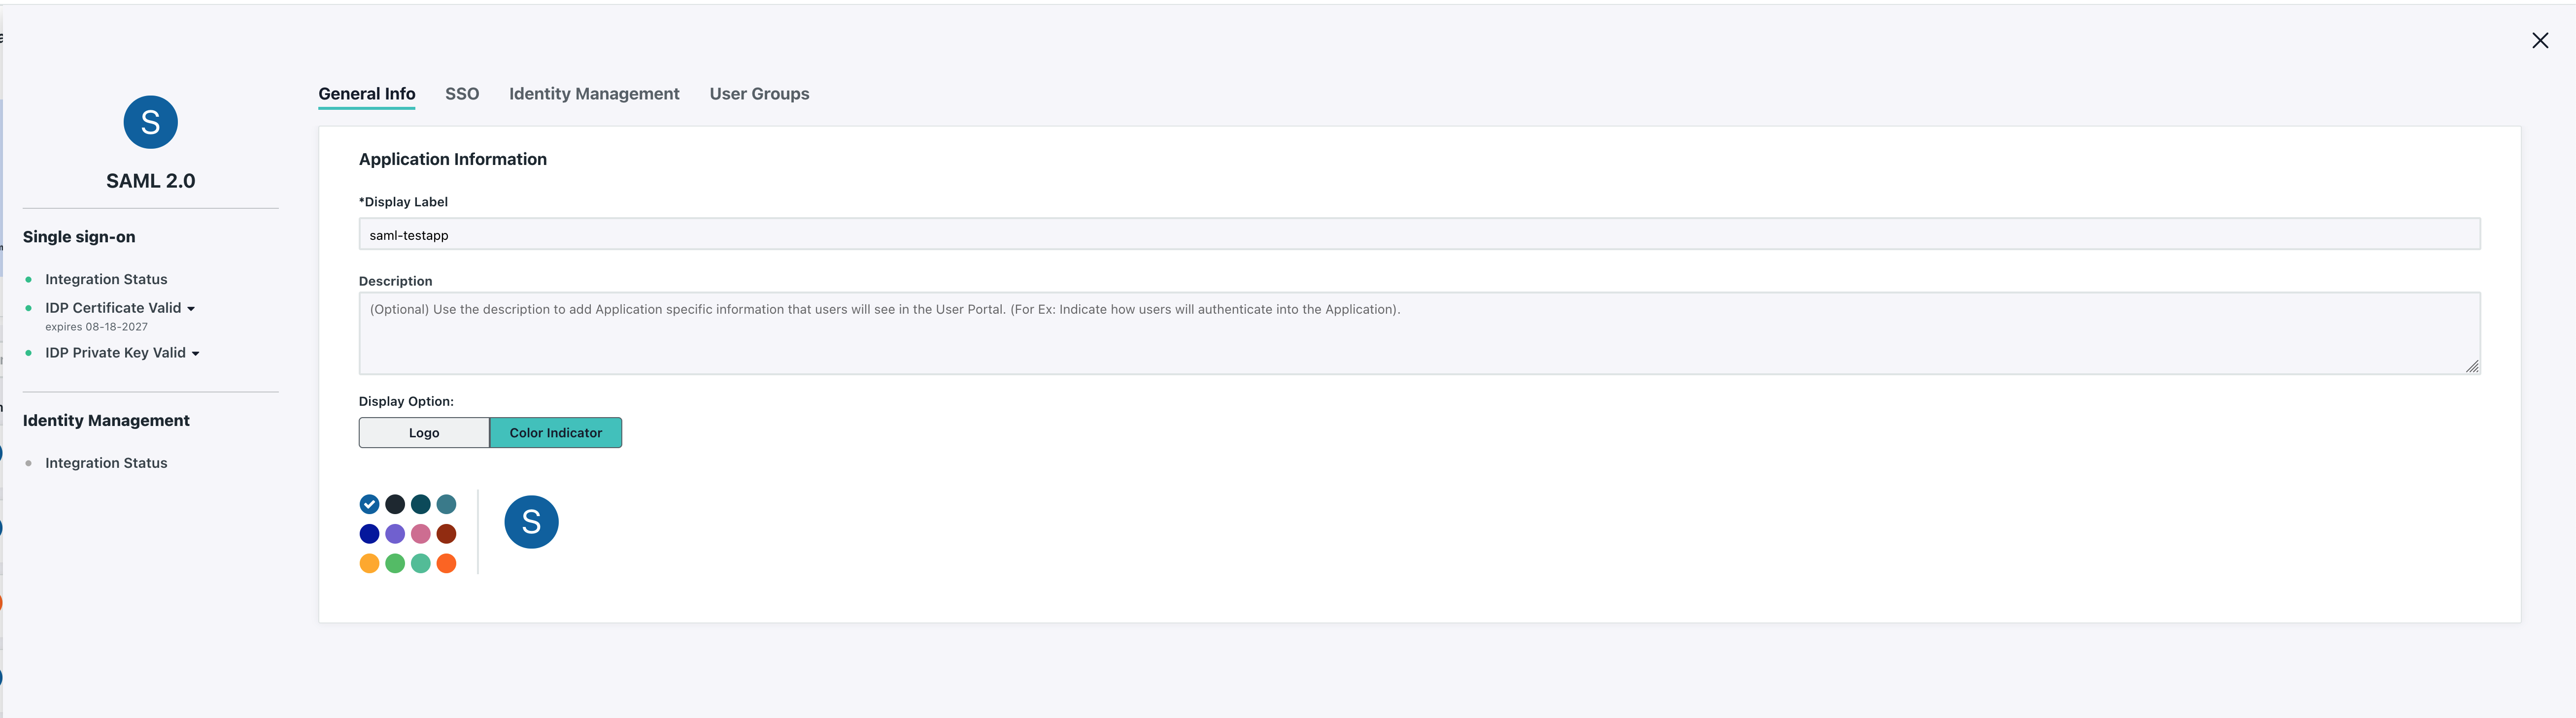
And click the SSO tab.
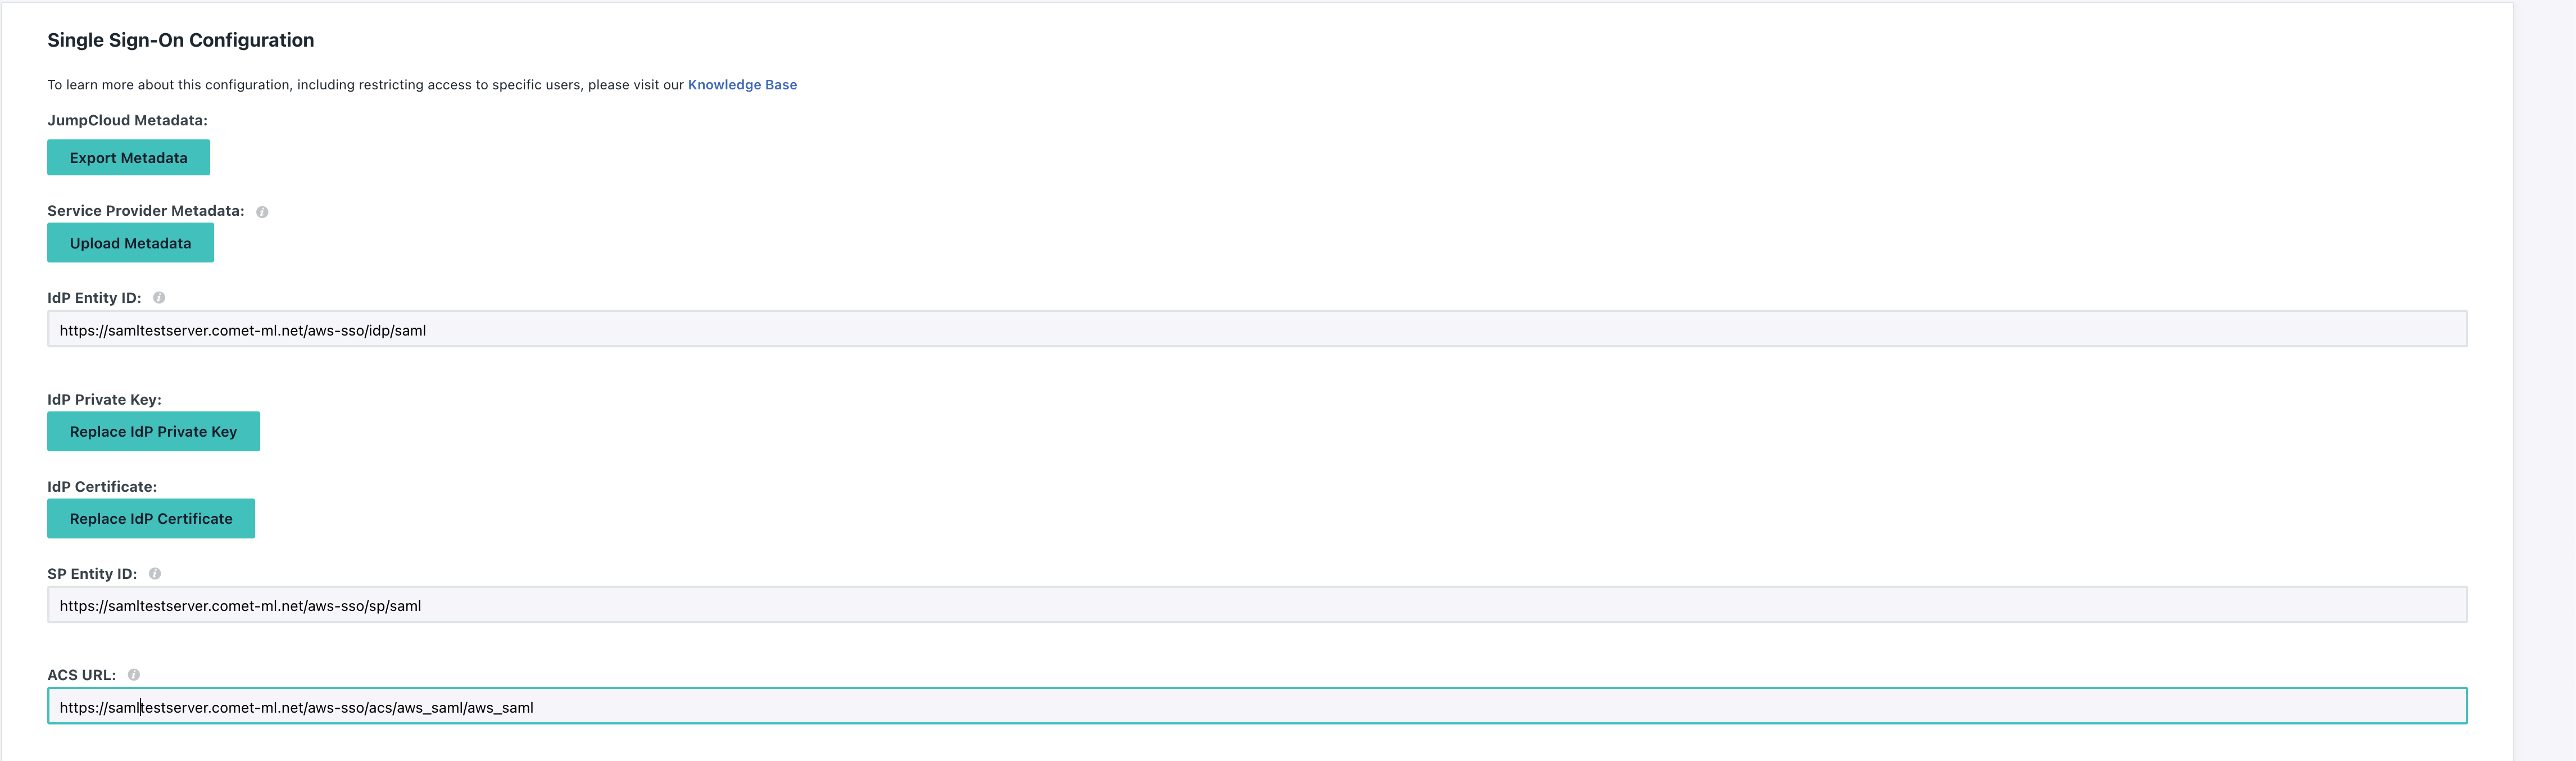
Set the IdP Entity ID and SP Entity ID to the same values you configured when running cometctl aio update-config for aws_saml_idp_entity_id and aws_saml_sp_entity_id, respectively.
Set the ACS URL to $comet_base_domain/aws-sso/acs/aws_saml/aws_saml
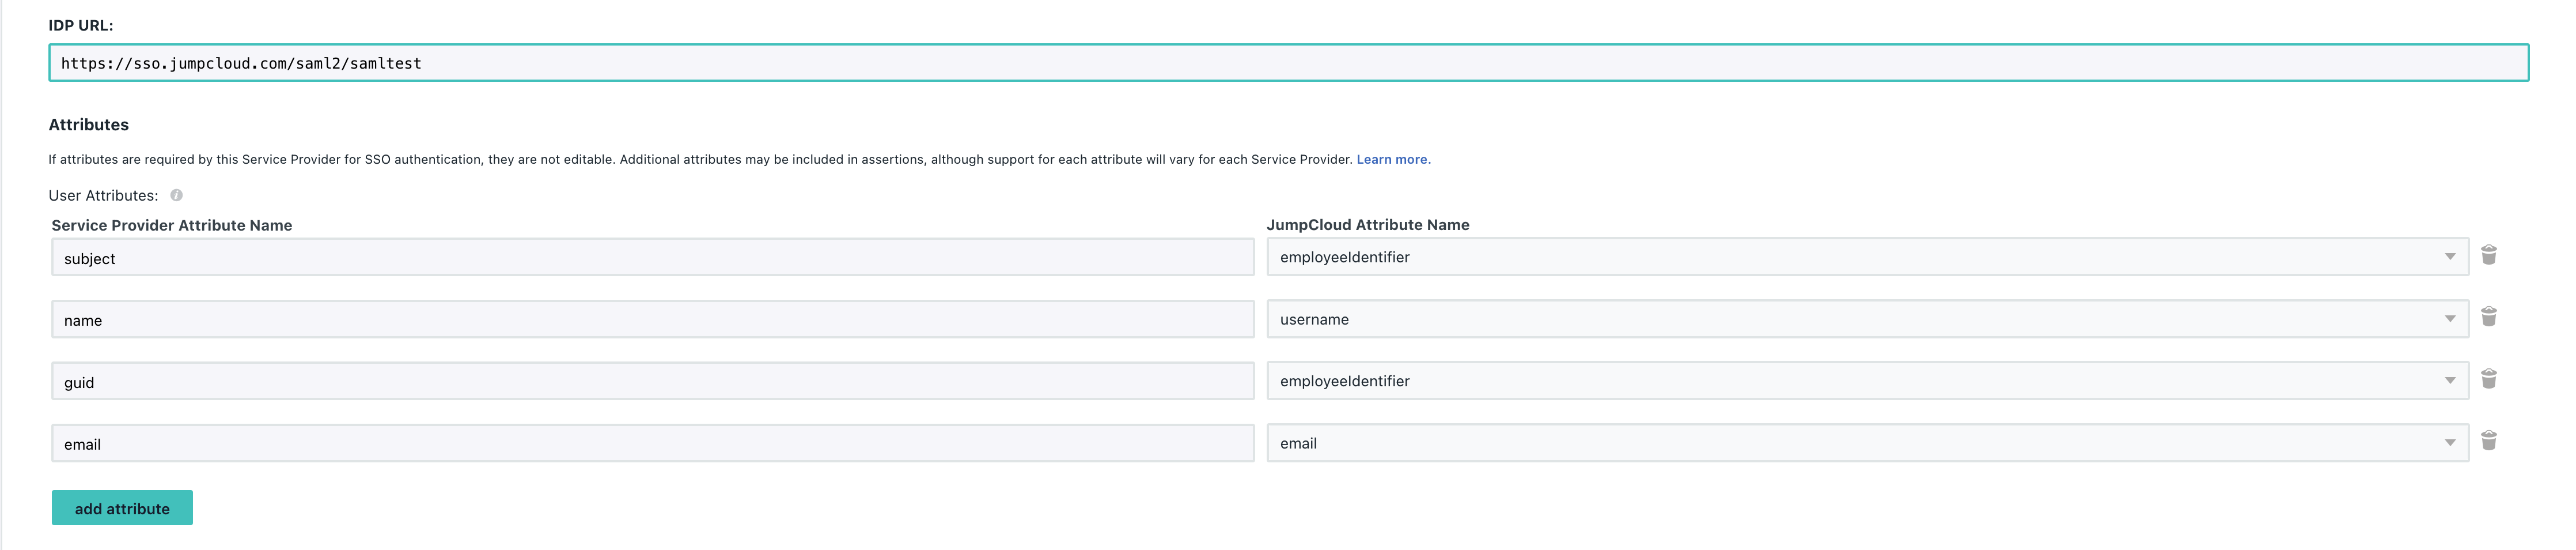
Further down, make sure to set the IDP URL and add the SAML Parameter mappings by clicking Add Attribute and setting the following:
Service Provider Attribute Name => JumpCloud Attribute Name
- name => username
- email => email
- subject => employeeIdentifier
- guid => employeeIdentifier
Please note that if the naming does not exactly match in the application then the integration will not work.
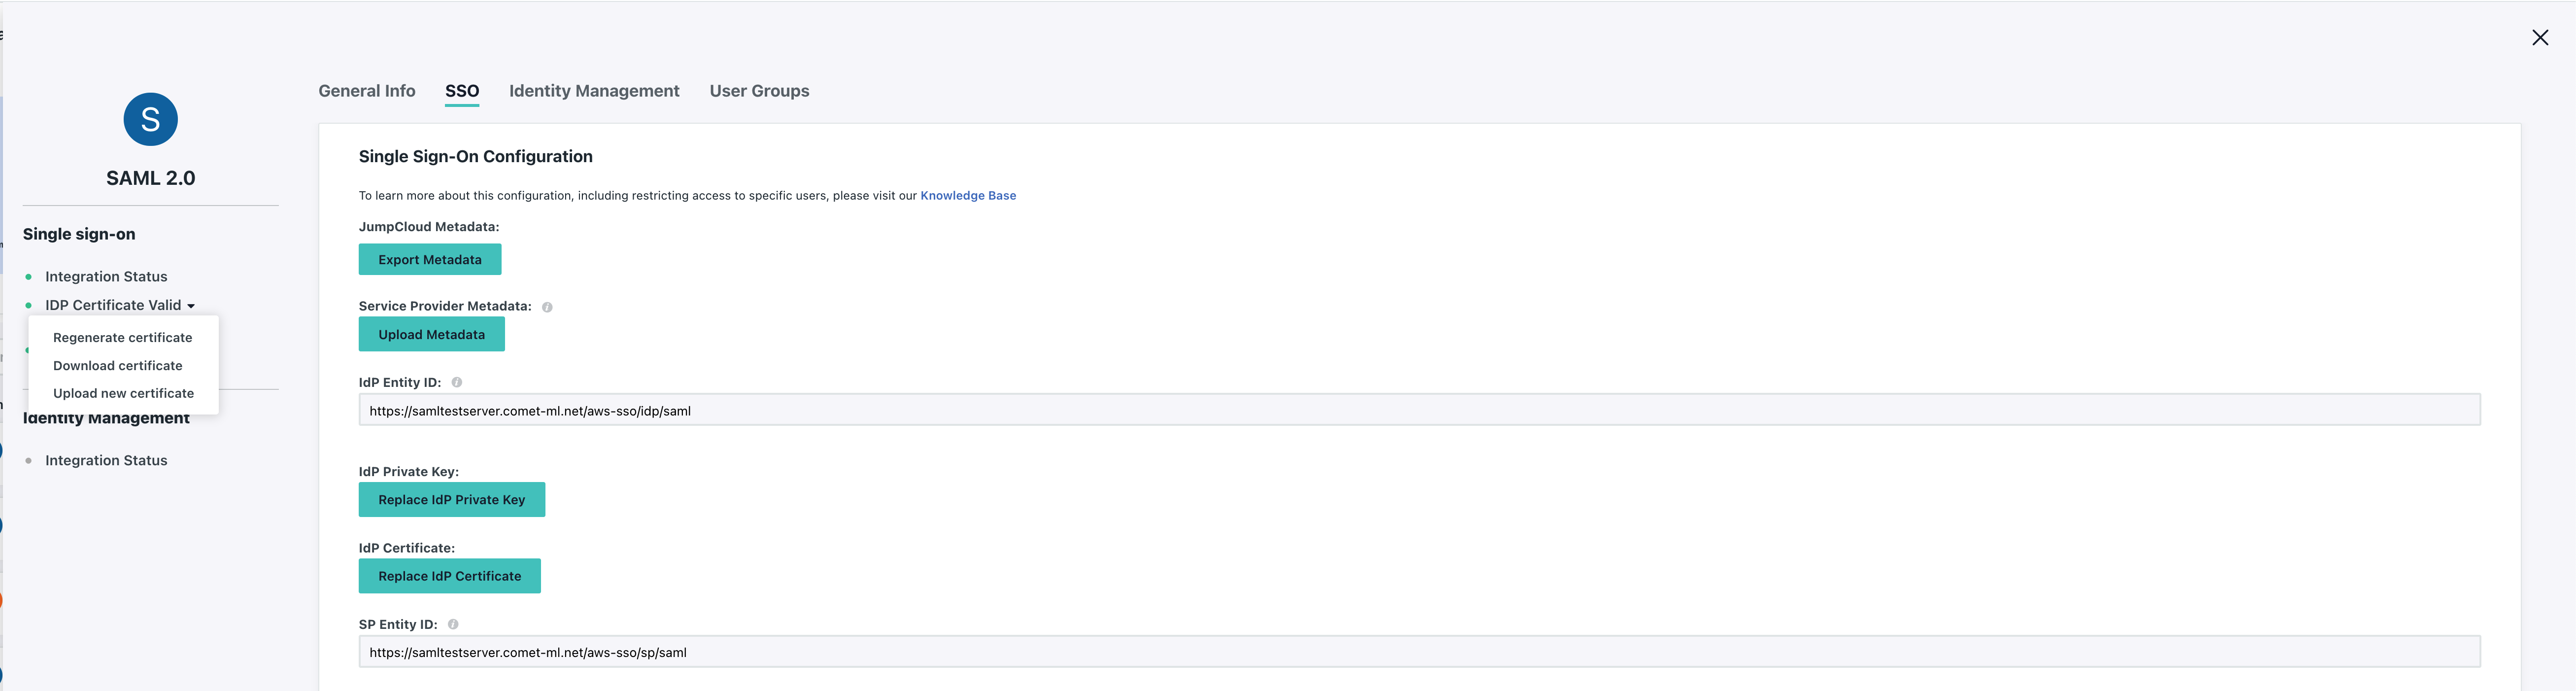
Lastly, make sure you download the IdP Certificate as you'll be providing this file to Comet as the value for aws_saml_idp_cert_file.
Since a SAML application isn't very useful without a collection of users allowed to log in, tab over to User Groups and make sure to associate a group of users to the SAML application to allow them to log in.
After you've finished this. Scroll down and hit Save.
AWS
AWS provides comprehensive documentation on how to set up a SAML 2.0 Application. In order to set this up you will need to have two values to populate your custom application with. These are the Service Provider Entity ID and Service Provider ACS URL. For more information on setting a descriptive Service Provider Entity ID click here.
The Service Provider ACS URL must be set to $comet_base_domain/aws-sso/acs/aws_saml/aws_saml.
- Custom Login URL: https://comet.example.com/aws-sso/login/aws_saml/aws_saml
- Custom ACS URL: https://comet.example.com/aws-sso/acs/aws_saml/aws_saml
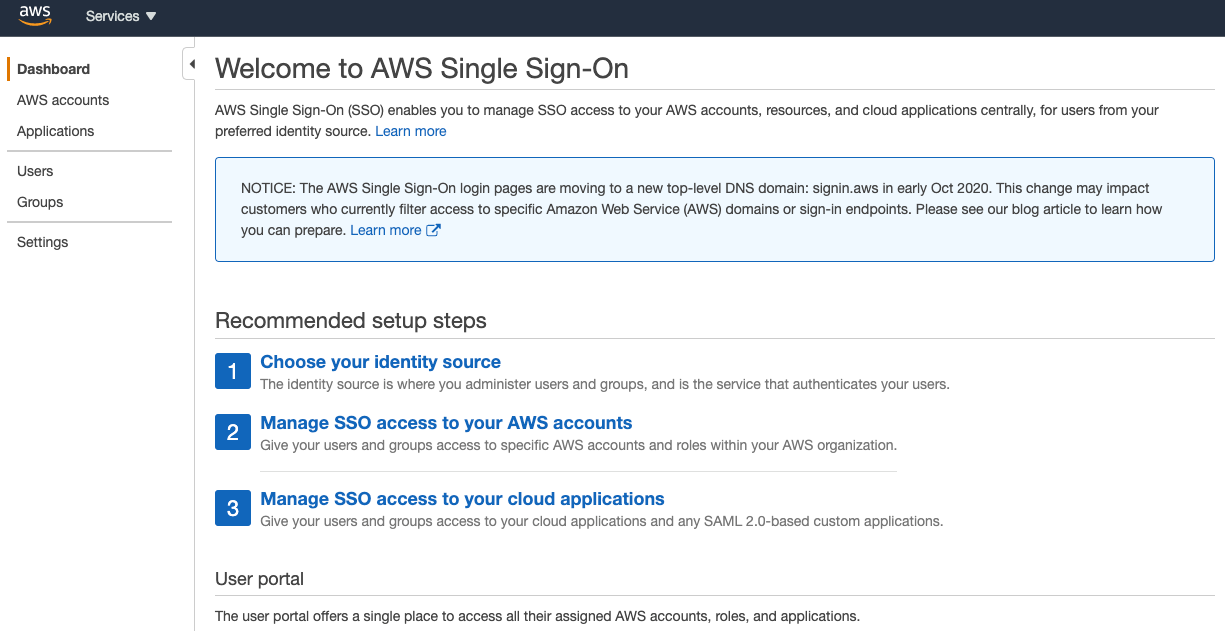
From the AWS Console, Navigate to the SSO Dashboard, this is an introduction and overview page which provides options for single sign on management.
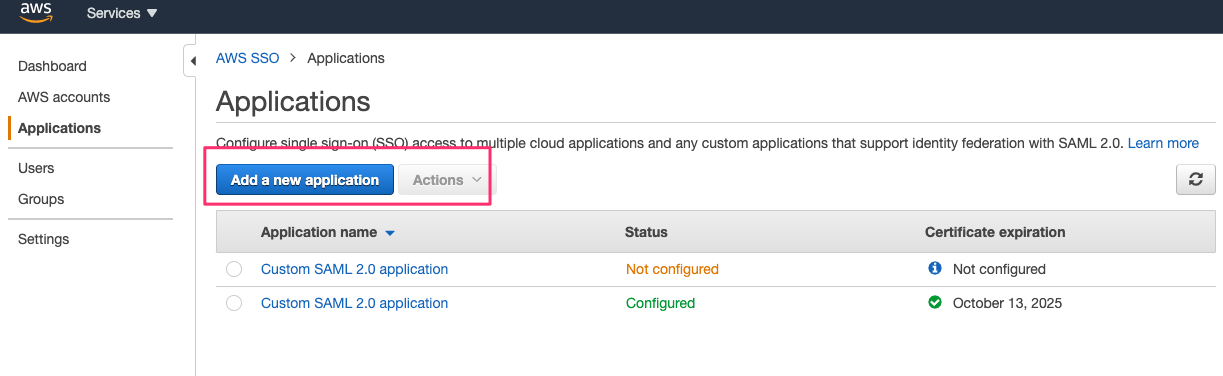
The SSO Application section is where you create a new custom application. The application section is also for managing existing SSO applications. Since we do not have an out of the box SSO application for Comet, select Add a new application.
Give your SAML application a descriptive name...
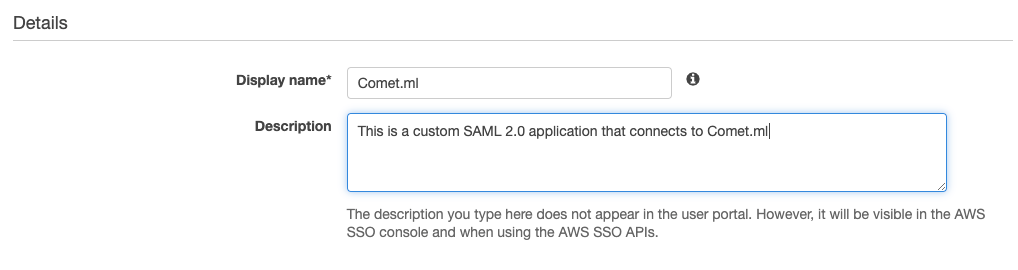
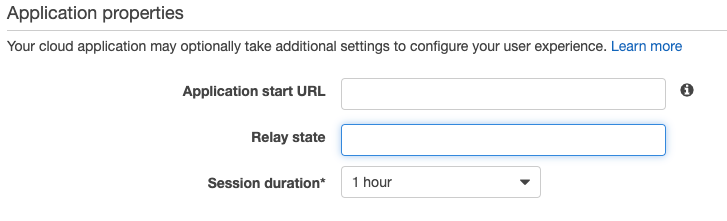
And move on to the properties section. This section will use the Service provider Entity ID and ACS URL from the previous section.
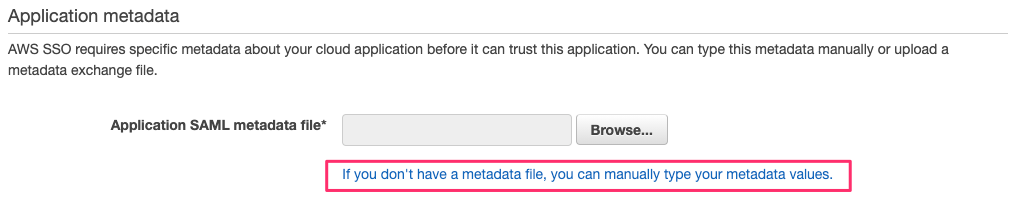
The Metadata section contains URLs that you will need to set later. Please note the AWS SSO SAML metadata file URL and the AWS SSO sign-in URL as we will be setting these later on when running cometctl aio update-config.
You will need to enter the application data manually as no SAML Metadata file is provided.
After clicking the highlighted URL, field for the application ACS URL and the application SAML audience URL will be provided.
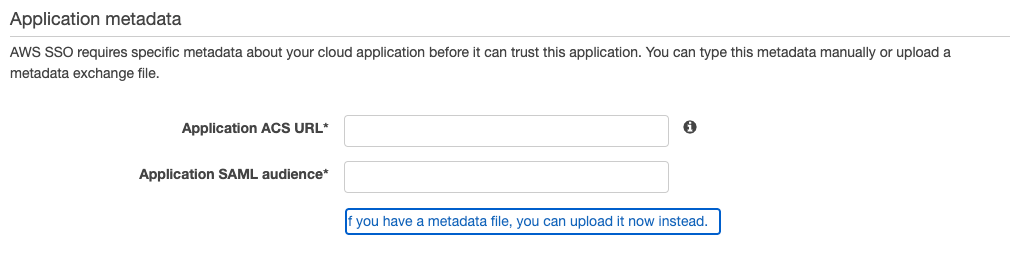
Fill in the ACS URL $comet_base_domain/aws-sso/acs/aws_saml/aws_saml and set application SAML audience URL to https://region-code.signin.aws.amazon.com/saml and save your application when finished.
After saving, you'll be taken to the SAML Attribute Mapping tab. Here's where we'll map the values Comet sends to AWS with the storage Schema SSO uses.
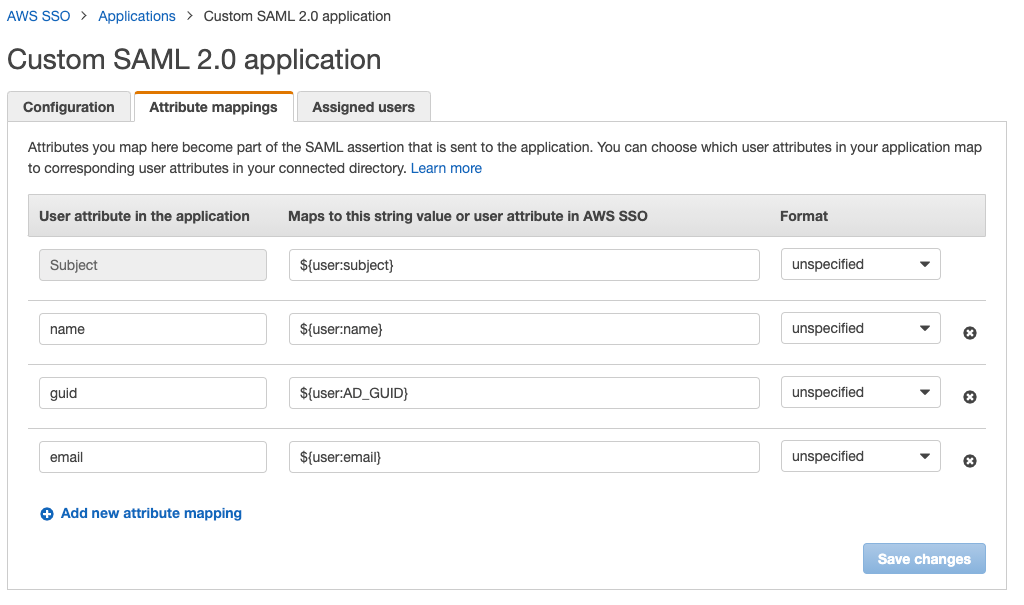
Service Provider Attribute Name => AWS Attribute Name
- name => ${user:name}
- email => ${user:email}
- subject => ${user:subject}
- guid => ${user:AD_GUID}
Please note that if the naming does not exactly match in the application then the integration will not work.
Since a SAML application isn't very useful without a collection of users allowed to log in, tab over to User Groups and make sure to associate a group of users to the SAML application to allow them to log in.
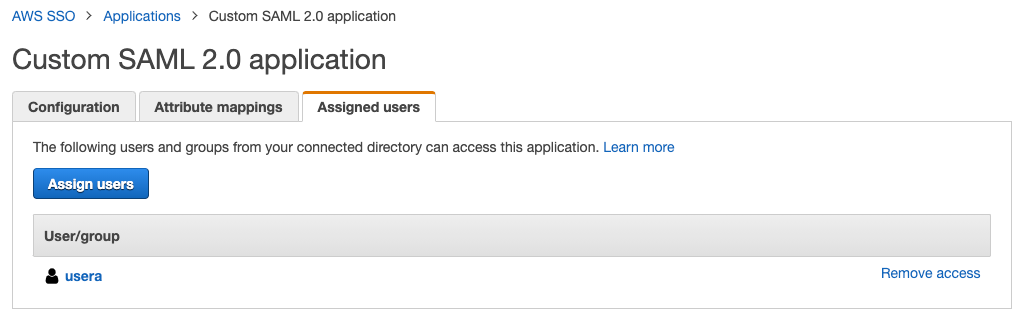
The “Assigned Users” Section is where you can select which users / groups will have access to the applcation.
Note that AWS permissions are binary. A user either has access or does not. AWS will not honor any more granular permissions.
Post-Setup
Once the IdP has been configured you can complete the comet configuration by setting the aws_saml_idp_sso_url and saml_idp_cert_file variables. Set the IdP SSO URL to the value found in the following field:
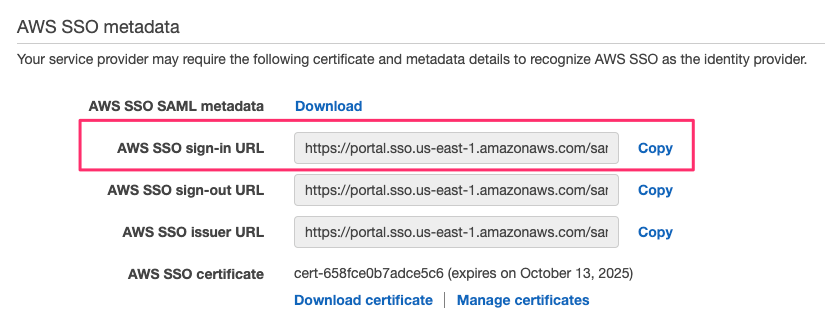
You will also need to extract the saml_idp_cert_file from the AWS SSO SAML metadata file URL you were told to save earlier.
Once complete follow all instructions in the application configuration.
GCP
Azure
Azure provides comprehensive documentation on how to set up a SAML 2.0 Application. In order to set this up you will need to have two values to populate your custom application with. These are the Custom Login URL and Service Provider ACS URL. For more information on setting a descriptive Service Provider Entity ID click here.
The Service Provider ACS URL must be set to $comet_base_domain/aws-sso/acs/aws_saml/aws_saml.
- Custom Login URL: https://comet.example.com/aws-sso/login/aws_saml/aws_saml
- Custom ACS URL: https://comet.example.com/aws-sso/acs/aws_saml/aws_saml
From the Azure Console, navigate to Enterprise Applications and create a new application: 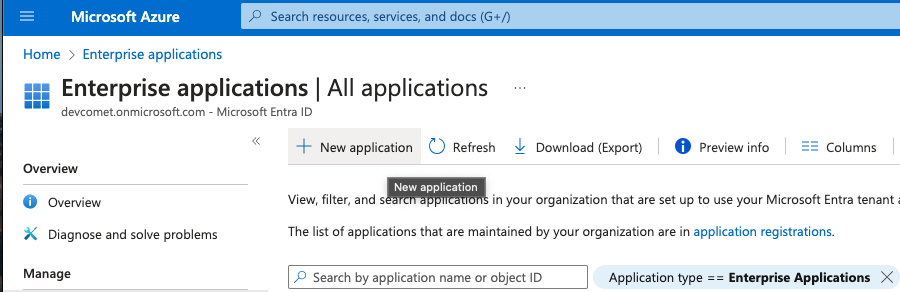
Then search for and add the Azure AD SAML Toolkit: 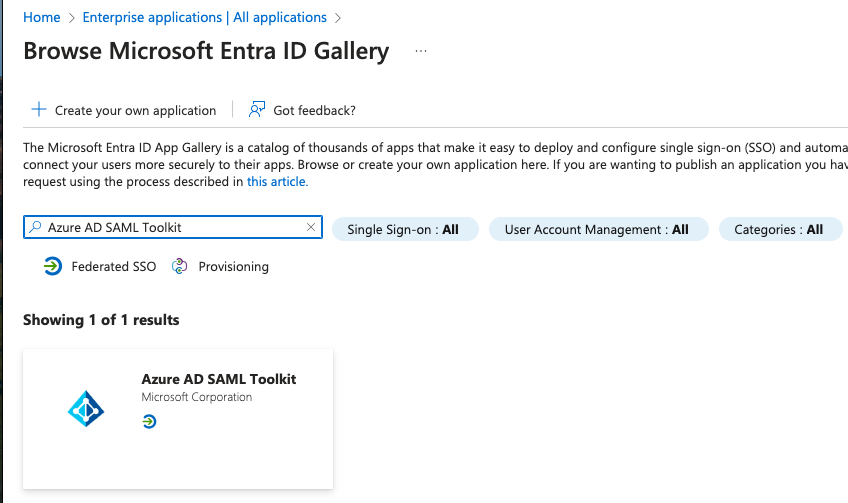
Give your SAML application a descriptive name: 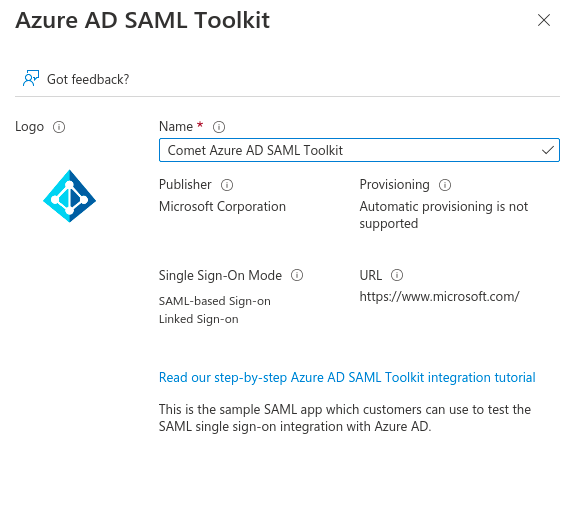
And set the Single Sign On mode to SAML 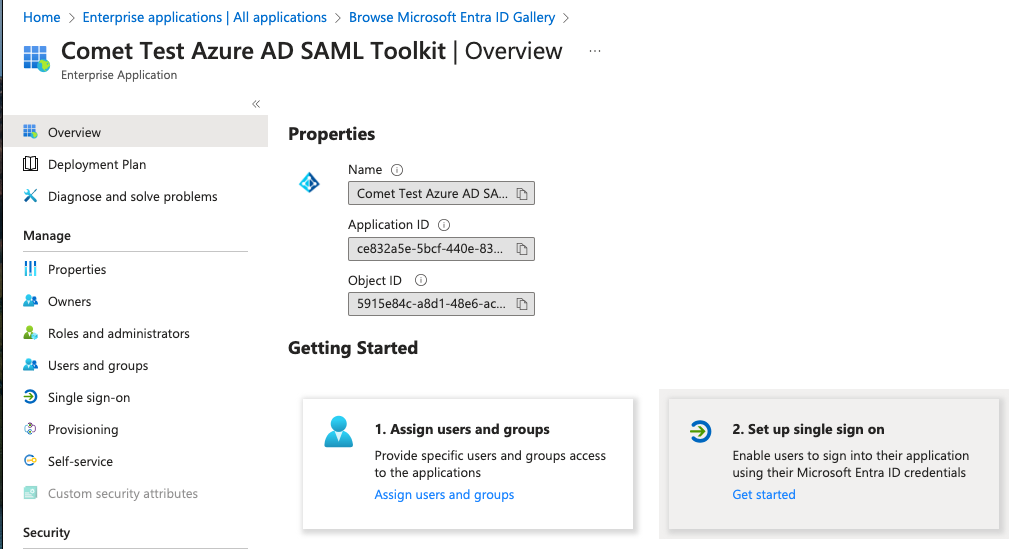
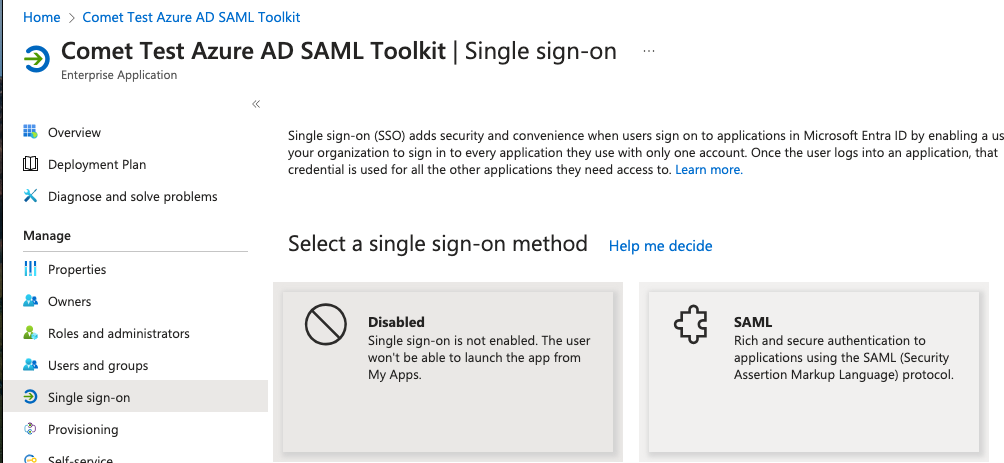
The Single Sign On section will use the Service provider Entity ID and ACS URL from the previous section. 
Click on Edit and set the Identifier (Entity ID) to the value you have set for aws_saml_sp_entity_id, which should be your $comet_base_domain If there are multiple entity IDs, mark it as default, and delete the default entry https://samltoolkit.azurewebsites.net. 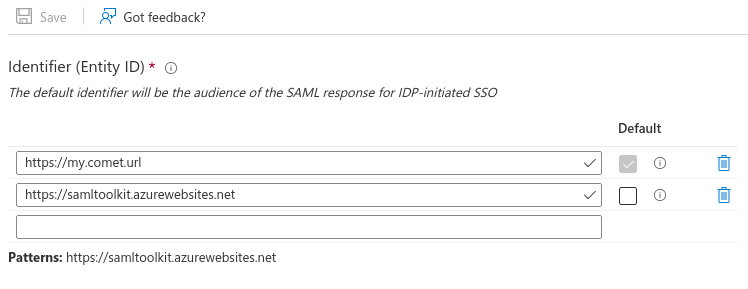
Edit the Reply URL (Assertion Consumer Service URL) and set it to the value you have set for aws_saml_sp_acs_url, which should be $comet_base_domain/aws-sso/acs/aws_saml/aws_saml Next, edit the Sign On URL and set it to $comet_base_domain/aws-sso/login/aws_saml/aws_saml 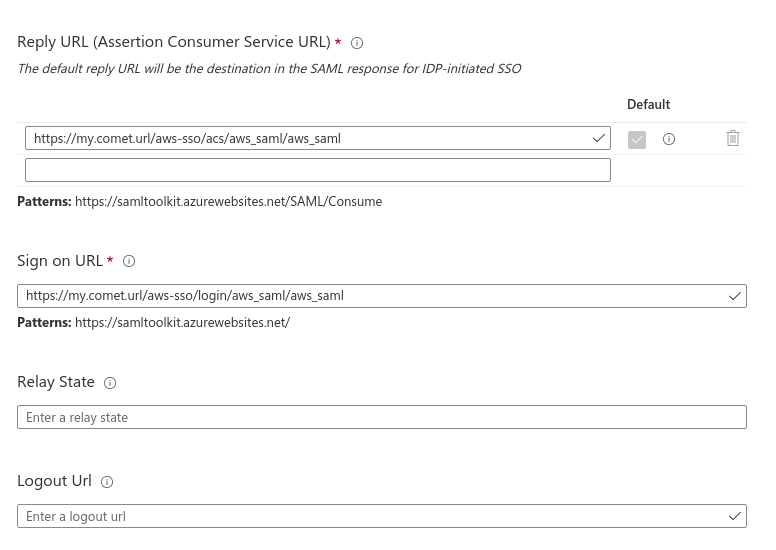
After saving, you'll need to update the Attributes and Claims section. Here's where we'll map the values Comet sends to Azure with the storage Schema that Active Directory uses. 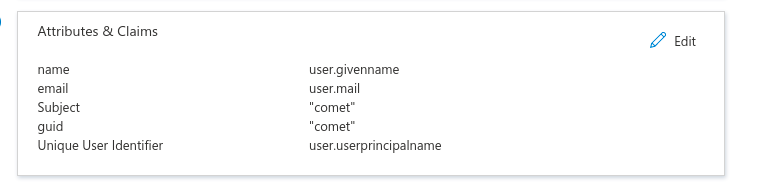
Service Provider Attribute Name => Active Directory Attribute Name
- name => user.userprincipalname
- email => user.mail
- subject => user.userprincipalname
- guid => user.objectid
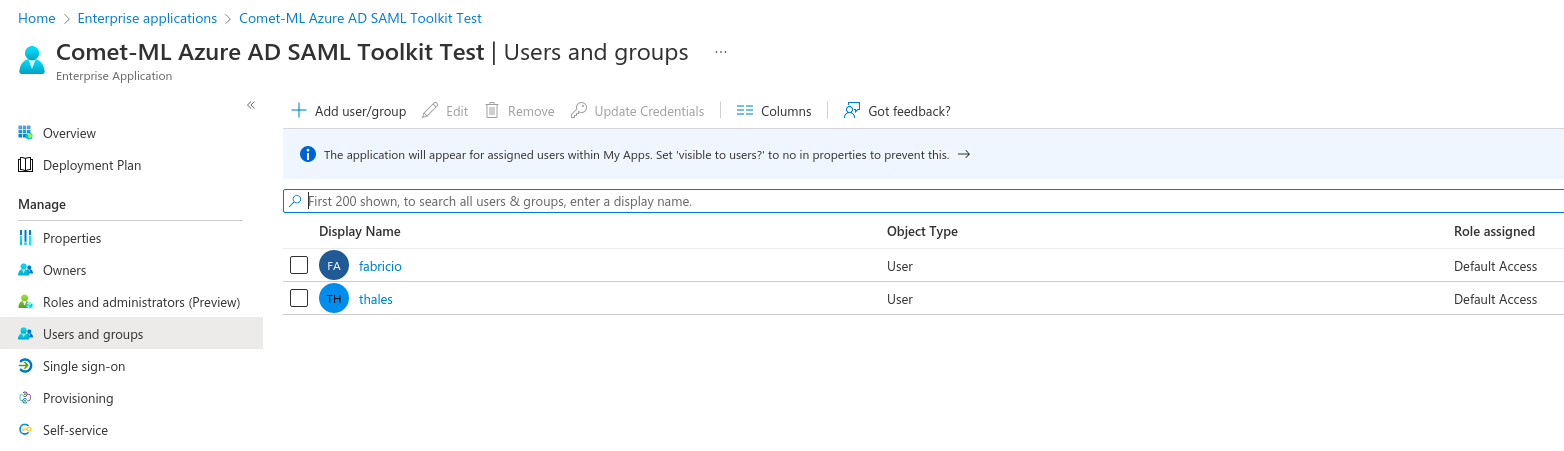
The “Assigned Users” Section is where you can select which users / groups will have access to the applcation.
Note that Azure permissions are binary. A user either has access or does not. Azure will not honor any more granular permissions.
Post-Setup
Once the IdP has been configured you can complete the comet configuration by setting the aws_saml_idp_entity_id, aws_saml_idp_sso_url and saml_idp_cert_file variables. Set the Entity ID to the value found in the following field: 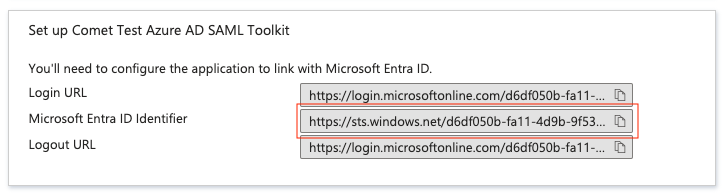
Set the IdP SSO URL to the value found in the following field: 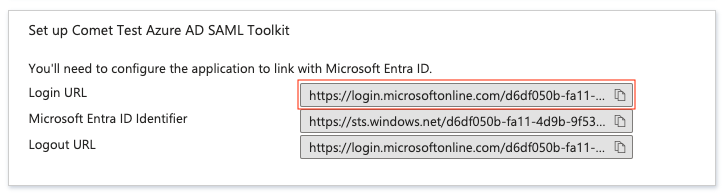
You will also need to download the certificate to provide for the saml_idp_cert_file value. 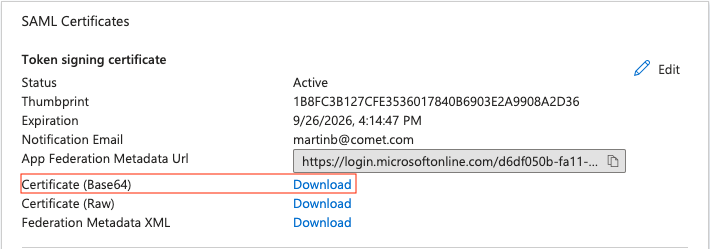 You can copy the file directly, or paste the contents including the header and footer to the file to be used.
Once complete follow all instructions in the application configuration.
Test the login process
Azure allows you to quickly validate whether your configuration is correct by providing a login test 
Click on Test sign in using a current user. Provided your current user is allowed to access comet you should be redirected to the application and logged in as your currently logged in Azure AD User. 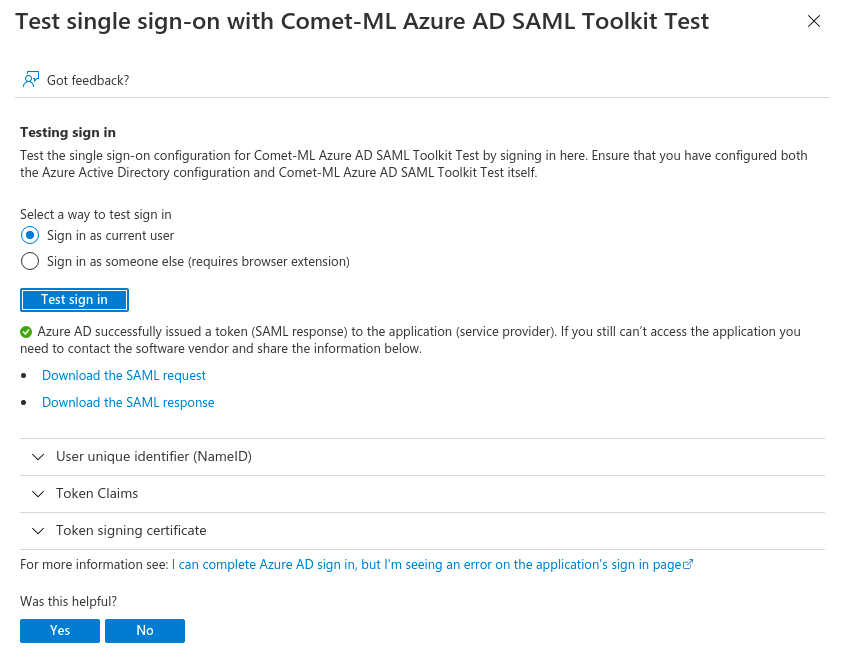
If you still can’t access the application, double check the application variables.